Editor's brief
This article provides a comprehensive guide to home plumbing. It covers understanding your system, essential DIY tools and techniques, and knowing when to call a professional. Topics include leak repair, drain clearing and maintenance.
#home plumbing
#diy repair
#plumbing maintenance
#plumbing code
Home plumbing systems, while often unseen, are essential to our daily lives, providing us with clean water and efficiently removing waste. As homeowners, gaining a basic understanding of our plumbing is crucial for addressing common issues and preventing costly emergencies. This article serves as a comprehensive guide to home plumbing essentials, covering everything from understanding your system and essential tools to tackling leaky faucets and clogged drains, as well as knowing when to call a professional and understanding plumbing codes. Understanding Your Home Plumbing System A homeowner equipped with a basic understanding of their home plumbing system is far better prepared to handle minor repairs, identify potential problems early, and communicate effectively with professional plumbers when necessary. Your plumbing isn't just a network of pipes; it's a complex system vital to the comfort and functionality of your home. Let’s delve into the crucial components and principles that govern it. First and foremost, familiarize yourself with the main elements: the supply lines, the drain lines, and the fixtures. Supply lines bring fresh water into your home, feeding faucets, showers, toilets, and appliances like washing machines and dishwashers. These are typically under pressure, so any leaks require immediate attention. Drain lines, on the other hand, remove wastewater from your home, carrying it to the sewer or septic system. These lines are gravity-dependent and prone to cl...
Home plumbing systems, while often unseen, are essential to our daily lives, providing us with clean water and efficiently removing waste. As homeowners, gaining a basic understanding of our plumbing is crucial for addressing common issues and preventing costly emergencies. This article serves as a comprehensive guide to home plumbing essentials, covering everything from understanding your system and essential tools to tackling leaky faucets and clogged drains, as well as knowing when to call a professional and understanding plumbing codes.
Understanding Your Home Plumbing System
A homeowner equipped with a basic understanding of their home plumbing system is far better prepared to handle minor repairs, identify potential problems early, and communicate effectively with professional plumbers when necessary. Your plumbing isn't just a network of pipes; it's a complex system vital to the comfort and functionality of your home. Let’s delve into the crucial components and principles that govern it.
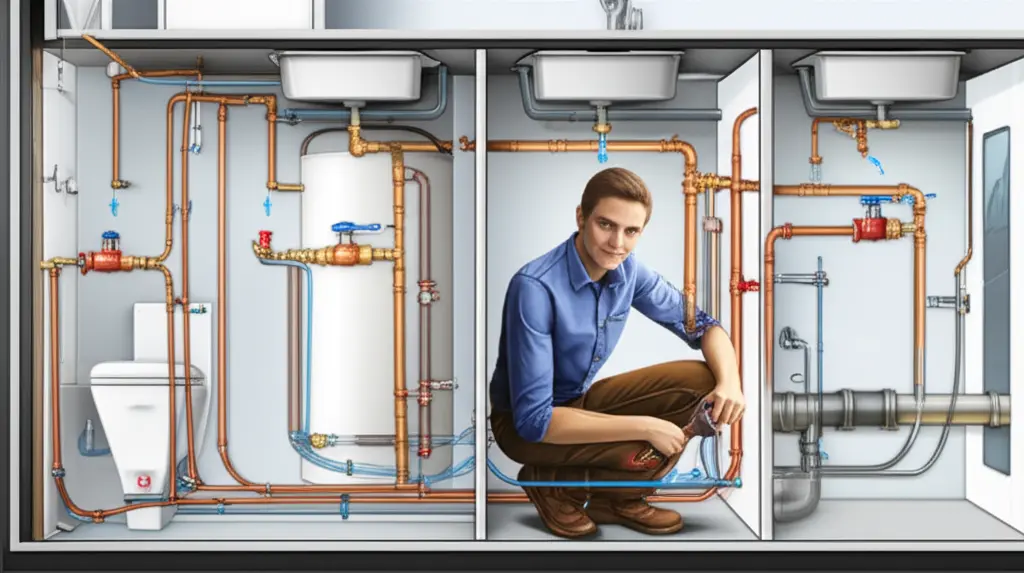
First and foremost, familiarize yourself with the main elements: the supply lines, the drain lines, and the fixtures. Supply lines bring fresh water into your home, feeding faucets, showers, toilets, and appliances like washing machines and dishwashers. These are typically under pressure, so any leaks require immediate attention. Drain lines, on the other hand, remove wastewater from your home, carrying it to the sewer or septic system. These lines are gravity-dependent and prone to clogs caused by hair, grease, and other debris. Finally, fixtures are the visible components – sinks, toilets, showers, bathtubs – where you interact with the plumbing system. Understanding how these three elements work together is the first step toward effective plumbing maintenance [1].
Crucially important for any homeowner is knowing the location of your main water shut-off valve. This valve controls the entire water supply to your house, and in an emergency, such as a burst pipe or a major leak, knowing its location and how to operate it can prevent significant water damage. Imagine discovering a rapidly leaking pipe behind your washing machine – without knowing where the shut-off valve is, you could be facing escalating water damage and a potentially hefty repair bill. Typically, the main shut-off valve is located where the water line enters your house, often in the basement, crawl space, or near the water meter. Take the time now to locate it and ensure you can turn it off quickly and easily. It is also a good idea to tag the valve so that anyone else in your household can find it easily in an emergency [2].
Different types of pipes are used in home plumbing, each with unique properties and best-use scenarios. PVC (polyvinyl chloride) is a rigid plastic pipe commonly used for drain lines due to its durability and resistance to corrosion. Copper pipes, known for their reliability and heat resistance, are often used for supply lines, particularly hot water lines, although they can be more expensive than other options. PEX (cross-linked polyethylene) is a flexible plastic tubing that is gaining popularity for its ease of installation and resistance to freezing. Understanding the type of pipe used in different parts of your home can help you choose the right materials for repairs and upgrades. For example, attempting to solder a PVC pipe like you would a copper pipe will result in disaster, highlighting the importance of material-specific knowledge [3].
Water pressure plays a vital role in how your plumbing functions. Too low, and you'll struggle to get a decent shower; too high, and you risk damaging your pipes and appliances. Ideally, water pressure should be between 40 and 60 PSI (pounds per square inch). You can purchase a water pressure gauge at most hardware stores and easily test the pressure at an outdoor faucet. Fluctuations or consistently low pressure can indicate problems like a clogged pipe, a faulty pressure regulator, or issues with the municipal water supply. Conversely, excessively high pressure might require the installation of a pressure regulator to protect your plumbing system [4].
Regular inspections of exposed pipes are invaluable for preventing larger, more costly repairs. Look for signs of corrosion, leaks (even small drips), or damage. Check under sinks, around toilets, and in basements or crawl spaces. Addressing minor problems early, such as tightening a loose connection or replacing a corroded pipe fitting, can prevent them from escalating into major leaks and structural damage. Catching a small drip before it becomes a gusher can save you hundreds, if not thousands, of dollars in the long run.
The age of your home significantly impacts the frequency and type of plumbing maintenance required. Older homes often have outdated plumbing systems made of materials like galvanized steel, which are prone to corrosion and can reduce water pressure. If your home is several decades old, consider having a professional plumber inspect your system to assess its condition and identify potential problems. Be prepared for the possibility of needing to replace sections of the plumbing to ensure its reliability and efficiency.
Finally, a basic understanding of how your water heater functions can prevent costly surprises. Water heaters are complex appliances with multiple components that can fail. Knowing the type of water heater you have (gas, electric, or tankless), its capacity, and how to perform basic maintenance tasks like flushing the tank to remove sediment can extend its lifespan and prevent unexpected breakdowns. Ignoring your water heater until it fails completely can leave you without hot water and facing a hefty replacement bill.
Essential Tools for DIY Plumbing Repair
Embarking on DIY plumbing repairs can save you a significant amount of money and provide a sense of accomplishment. However, success hinges on having the right tools at your disposal. Just as a surgeon needs specialized instruments, a DIY plumber requires a curated selection of tools to tackle common issues effectively and safely. This section outlines the essential tools that should form the cornerstone of your plumbing toolkit, enabling you to address leaky faucets, clogged drains, and other minor plumbing problems with confidence.
First and foremost, a pipe wrench is an indispensable tool for any aspiring DIY plumber. These heavy-duty wrenches are specifically designed for gripping and turning pipes and fittings. Their adjustable jaws provide a secure hold, allowing you to tighten connections to prevent leaks or loosen stubborn fittings that have become corroded over time. Investing in a quality pipe wrench, preferably a set with varying sizes, ensures you're prepared for a wide range of pipe diameters you might encounter in your home's plumbing system. Imagine trying to replace a section of rusty galvanized steel pipe without a pipe wrench – it's a task virtually impossible to accomplish with standard wrenches [5].
No plumbing toolkit is complete without a trusty plunger. This simple yet effective tool is your first line of defense against minor clogged drains. Whether it's a sink, toilet, or shower drain, a plunger uses pressure to dislodge obstructions and restore proper flow. There are two main types: the standard cup plunger for flat surfaces like sinks and tubs, and the flange plunger, which has a soft rubber flap that folds out to create a tighter seal in toilet bowls. Regular use of a plunger can prevent minor clogs from escalating into major plumbing emergencies requiring more drastic measures.
An adjustable wrench is another versatile tool that deserves a place in your plumbing arsenal. Unlike a pipe wrench, which is designed for gripping round pipes, an adjustable wrench can be used on a variety of nuts and bolts, including those found on faucets and other plumbing fixtures. Its adjustable jaws allow you to customize the wrench to fit different sizes, making it a useful tool for various tasks beyond just plumbing. When working with delicate faucet components, an adjustable wrench provides a controlled grip that minimizes the risk of damage.
Plumber's tape, also known as Teflon tape or thread seal tape, is a must-have for creating watertight seals on threaded pipe connections. This thin, white tape is wrapped around the threads of a pipe fitting before it's screwed into place. The tape fills in any microscopic gaps in the threads, preventing water from seeping through. Using plumber's tape is a simple yet crucial step in preventing leaks and ensuring the longevity of your plumbing repairs. Without it, even the tightest connections can eventually succumb to leaks, leading to water damage and wasted resources [6].
For reaching those awkwardly placed nuts under sinks, a basin wrench is an invaluable tool. Its long handle and swiveling jaw allow you to access and loosen or tighten nuts that would be impossible to reach with a standard wrench. Replacing a faucet or disconnecting a sink drain becomes significantly easier with a basin wrench in your toolbox. Trying to perform these tasks without one often results in frustration, scraped knuckles, and potentially damaging the surrounding cabinetry.
When a plunger isn't enough to clear a stubborn clog, a drain snake or auger is your next resort. These flexible tools are designed to reach deep into drainpipes and break up or retrieve obstructions. A drain snake typically consists of a long, flexible cable with a corkscrew or cutting head on the end. By feeding the snake into the drain and rotating it, you can effectively clear blockages caused by hair, grease, or other debris. Different types of drain snakes are available, ranging from small, handheld versions for minor clogs to larger, motorized models for more severe obstructions.
Above all else, safety should be your top priority when undertaking any plumbing repair. Safety glasses are essential for protecting your eyes from debris, chemicals, or accidental splashes. Gloves protect your hands from dirt, grime, and potentially harmful substances. Plumbing work can often involve working in tight spaces and handling sharp objects, so wearing appropriate safety gear is crucial for preventing injuries.
Finally, while not strictly essential for all plumbing repairs, a multimeter can be a valuable tool for diagnosing electrical issues related to plumbing appliances like water heaters and garbage disposals. A multimeter allows you to test voltage, continuity, and resistance, helping you identify problems with wiring, circuits, or electrical components. However, if you're not comfortable working with electricity, it's always best to consult a qualified electrician. Plumbing and electrical systems are often intertwined, and understanding the basics of electrical safety is essential for preventing accidents. By assembling this essential toolkit, you'll be well-equipped to tackle a wide range of common plumbing repairs with confidence and expertise, saving money and ensuring the smooth operation of your home's plumbing system.
Tackling a Leaky Faucet: A Step-by-Step Guide
A dripping faucet is more than just an annoyance; it's a constant drain on your water bill and a potential sign of more significant plumbing issues lurking beneath the surface. Before calling a plumber for what might seem like a minor inconvenience, consider tackling the problem yourself. With a few basic tools and a systematic approach, repairing a leaky faucet is often a manageable DIY project. However, safety and understanding are paramount. The first and arguably most crucial step is to turn off the water supply to the faucet before starting any repairs. Neglecting this can lead to a sudden burst of water, causing damage and making the repair significantly more difficult. Typically, shut-off valves are located directly beneath the sink. Turn both the hot and cold water valves clockwise until they are completely closed. If you can't locate individual shut-off valves, you may need to turn off the main water supply to your house, usually found in the basement or near the water meter. Once the water is off, turn on the faucet to relieve any remaining pressure in the lines.
Next, identify the type of faucet you're dealing with, as repair methods vary significantly between different designs. The four main types are compression, ball, cartridge, and ceramic disc faucets. A compression faucet, the oldest and most common type, is easily identifiable by its separate hot and cold water handles that require tightening to stop the water flow. Ball faucets, commonly found in kitchen sinks, have a single lever that controls both water flow and temperature. Cartridge faucets also use a single lever but are distinguished by a cylindrical cartridge inside the faucet body. Finally, ceramic disc faucets, the most modern and generally the most expensive, are characterized by a wide cylindrical body and a single lever that rotates a ceramic disc to control water flow. Understanding which type you have is crucial because the internal components and repair procedures differ greatly. Trying to repair a ceramic disc faucet using instructions for a compression faucet, for example, would be futile and potentially damaging [7].
With the water off and the faucet type identified, you can begin disassembly. Disassemble the faucet carefully, noting the order of the parts. This is essential for proper reassembly later. Before you even touch the faucet, take photos of each step with your smartphone. Lay out the removed parts in the order you took them off. Faucets often have small screws, washers, and O-rings that are easy to misplace or forget the correct placement of. A clear understanding of the faucet's anatomy will be immensely helpful when putting it back together. Typically, you'll start by removing decorative caps or handles to access screws that hold the faucet together. Use the appropriate screwdriver to avoid stripping the screw heads.
Once disassembled, inspect O-rings, washers, and cartridges for wear and tear; replace as needed. These small, inexpensive parts are often the culprits behind leaky faucets. Over time, the rubber or plastic in these components can deteriorate, crack, or become brittle, leading to leaks. Examine each O-ring and washer closely for any signs of damage. If they appear worn or damaged, replace them with new ones of the exact same size and type. Replacement kits are readily available at most hardware stores and typically include a variety of common O-rings and washers. If you're unsure about the correct size, take the old part with you to the store for comparison. Similarly, inspect the cartridge (if applicable) for any cracks or damage. Cartridges are usually specific to the faucet model, so it's essential to get the correct replacement.
In addition to replacing worn parts, clean any mineral buildup or corrosion on the faucet components. Hard water can leave behind mineral deposits that accumulate over time, hindering the faucet's operation and contributing to leaks. Use a small brush and a mild cleaning solution (vinegar works well) to remove any buildup. For stubborn deposits, you can soak the parts in vinegar for a few hours before scrubbing. Be careful not to use abrasive cleaners that could damage the faucet's finish. Cleaning the components not only improves the faucet's performance but also helps prevent future leaks by ensuring a tight seal between the parts.
Now comes the crucial part: reassemble the faucet, ensuring all parts are properly aligned. Refer to the photos and notes you took during disassembly to ensure everything goes back together in the correct order. Tighten screws and nuts securely, but be careful not to overtighten them, as this could damage the faucet or strip the threads. Pay close attention to the alignment of the parts, ensuring that O-rings and washers are seated properly and that the cartridge (if applicable) is fully inserted. A common mistake is to misalign the cartridge, which can lead to leaks or difficulty controlling the water flow.
With the faucet reassembled, turn the water supply back on slowly and check for leaks. Open the shut-off valves gradually to avoid a sudden surge of water pressure. As the water begins to flow, carefully inspect all connections for any signs of leaks. If you spot a leak, immediately turn off the water supply and re-examine the affected area. It's possible that a part is misaligned or not tightened properly. Make any necessary adjustments and repeat the process until the leak is resolved.
Finally, for persistent leaky faucet issues, consider replacing the entire faucet assembly. Sometimes, despite your best efforts, a leaky faucet simply cannot be repaired due to extensive damage or wear and tear. In such cases, replacing the entire faucet assembly is often the most practical solution. New faucets are relatively inexpensive and can be installed with basic plumbing skills. Moreover, a new faucet can often improve the look and functionality of your sink, providing a long-term solution to the leaky faucet problem. While tackling plumbing repairs can seem daunting, approaching it systematically with careful planning and the right tools can empower you to maintain your home with confidence.
Clearing Clogged Drains: Simple Solutions
A clogged drain is a common household nuisance that can quickly escalate into a major plumbing problem if left unaddressed. Fortunately, many drain clogs can be resolved with a few simple tools and readily available household items, empowering you to tackle these issues yourself and save on costly plumbing service calls. Before reaching for harsh chemical drain cleaners, which can damage your pipes and pose health risks, explore these safer and more effective DIY solutions.
Our first line of defense is the humble plunger. Often overlooked, a plunger, when used correctly, can dislodge a surprising number of clogs. The key is creating a tight seal around the drain opening. For sink drains, ensure the overflow drain is covered with a wet cloth or your hand to prevent air from escaping, maximizing the suction. Add enough water to the sink or tub to cover the cup of the plunger. Then, vigorously plunge up and down, maintaining the seal, for several minutes. The pressure created by the plunger can often break up the clog and allow the water to drain freely. Don't give up after just a few attempts; persistence is often rewarded.
If plunging doesn't do the trick, consider the power of boiling water. This is a particularly effective method for clogs caused by grease and soap buildup, common culprits in kitchen sinks. Carefully pour a kettle or pot of boiling water down the drain. The heat can melt the grease, allowing it to flush away. Be cautious when using boiling water, especially with PVC pipes, as extreme heat can potentially damage them. If you have PVC pipes or are unsure of your plumbing material, opt for very hot tap water instead. Repeat the process a few times, allowing the hot water to sit for a minute or two between pours to maximize its effectiveness.
For a more potent, yet still safe, approach, try the baking soda and vinegar method. This creates a natural bubbling action that can dislodge stubborn clogs. Start by pouring about one cup of baking soda down the drain, followed by one cup of white vinegar. Immediately cover the drain opening with a plug or cloth to contain the fizzing reaction. Let the mixture sit for 20-30 minutes. The bubbling action helps to break down the clog. After the waiting period, flush the drain with hot water. Repeat this process if necessary. The combination of baking soda and vinegar is an environmentally friendly alternative to harsh chemical drain cleaners.
When simple methods fail, it's time to bring in the big guns: the drain snake or auger. A drain snake is a flexible tool designed to reach deeper into the drainpipe and physically break up or retrieve the clog. Carefully insert the snake into the drain opening and feed it down the pipe, rotating it as you go. When you encounter resistance, continue rotating the snake to break up the clog or hook onto it. Once you feel the clog is dislodged or hooked, carefully pull the snake out, removing the debris. Drain snakes are available in various lengths and materials, so choose one that is appropriate for the size and location of your drain.
Kitchen sinks often suffer from clogs in the P-trap, the curved pipe located under the sink. This trap is designed to catch debris and prevent sewer gases from entering the house. Over time, however, it can become clogged with food scraps, grease, and other materials. To clean the P-trap, place a bucket underneath to catch any water. Loosen the slip nuts that connect the P-trap to the drain pipes. Carefully remove the P-trap and empty its contents into the bucket. Clean the inside of the trap with a brush or cloth, removing any remaining debris. Reassemble the P-trap, ensuring the slip nuts are tightened securely to prevent leaks.
Prevention is always better than cure. To avoid future clogs, be mindful of what you put down your drains. Never pour grease or food scraps down the drain. Grease solidifies as it cools, creating a sticky mess that can trap other debris and cause a clog. Dispose of grease in a separate container and throw it away with your garbage. Food scraps should be scraped into the trash or composted.
Regularly flushing your drains with hot water can also help prevent buildup. Once a week, pour a kettle of hot water down each drain to flush away any accumulated grease and soap. This simple step can significantly reduce the risk of clogs.
Finally, consider using a drain screen to catch hair and other debris before they enter the drainpipe. These inexpensive screens fit easily into your drain opening and prevent large particles from going down the drain. Clean the screen regularly to prevent it from becoming clogged itself. By implementing these preventative measures, you can significantly reduce the frequency of drain clogs and keep your plumbing system flowing smoothly.
Preventative Home Plumbing Maintenance
The key to avoiding major plumbing headaches and costly repairs lies in proactive preventative maintenance. Neglecting your plumbing system is akin to ignoring the oil changes on your car – eventually, something will break down, and the consequences can be significant. By dedicating a little time and effort to regular checks and simple upkeep, you can extend the lifespan of your plumbing, prevent emergencies, and save money in the long run.
One of the most crucial, and easiest, preventative measures is to regularly check for leaks around faucets, toilets, and exposed pipes. Even a small, seemingly insignificant drip can waste a surprising amount of water over time, leading to higher water bills and potential water damage. Look closely at the base of faucets, around pipe connections under sinks, and around the toilet bowl. Pay particular attention to the supply lines leading to your washing machine and dishwasher. Early detection allows you to address minor issues, such as a worn-out washer or a loose connection, before they escalate into major problems requiring professional intervention [8]. Imagine ignoring a small leak under your kitchen sink for months. Eventually, the constant moisture can lead to mold growth, rot the cabinet beneath, and potentially damage the flooring, turning a simple fix into a costly and disruptive renovation.
In regions prone to freezing temperatures, insulating exposed pipes in unheated areas is absolutely essential. Pipes located in basements, crawl spaces, and exterior walls are particularly vulnerable. When water freezes, it expands, creating tremendous pressure within the pipes. This pressure can cause pipes to burst, leading to extensive water damage throughout your home. Pipe insulation is relatively inexpensive and easy to install. Foam sleeves or fiberglass wrap can provide adequate protection against freezing temperatures. You might also consider heat tape for particularly vulnerable areas. Remember, even a brief period of sub-freezing temperatures can be enough to cause a pipe to burst, so don't delay this crucial winterization task. Failing to properly insulate your pipes could result in thousands of dollars in damage, not to mention the inconvenience and stress of dealing with a plumbing emergency.
Another often-overlooked aspect of preventative plumbing maintenance is flushing your water heater annually to remove sediment buildup. Over time, minerals in the water can accumulate at the bottom of the tank, forming a layer of sediment. This sediment reduces the efficiency of the water heater, forcing it to work harder to heat the water, which translates into higher energy bills. Additionally, sediment buildup can corrode the tank, shortening its lifespan and potentially leading to a tank rupture. Flushing the water heater is a relatively simple task that can significantly extend its lifespan and improve its performance. Consult your water heater's manual for specific instructions on how to properly flush the tank. Neglecting this task can significantly decrease the efficiency of your water heater, potentially costing you hundreds of dollars in wasted energy over the years, and even lead to premature failure of the unit.
If you live in an area with hard water, consider installing a water softener. Hard water contains high concentrations of minerals like calcium and magnesium, which can cause scale buildup in pipes, faucets, and appliances. This scale buildup can reduce water flow, decrease the efficiency of appliances like dishwashers and washing machines, and even damage plumbing fixtures over time. A water softener removes these minerals, preventing scale buildup and extending the lifespan of your plumbing system and appliances. While the initial investment in a water softener may seem significant, the long-term benefits, including reduced appliance repairs and improved water quality, can easily outweigh the costs.
Furthermore, avoid using chemical drain cleaners as a first resort for clogged drains. While they may seem like a quick and easy solution, these harsh chemicals can actually damage pipes over time, particularly older pipes made of PVC or metal. The chemicals can corrode the pipes, weakening them and making them more susceptible to leaks and bursts. Instead of relying on chemical drain cleaners, try using a plunger or a plumbing snake to clear the clog. You can also try pouring boiling water down the drain, or using a mixture of baking soda and vinegar followed by hot water. If these methods don't work, it's best to call a professional plumber to diagnose and clear the clog without damaging your pipes. Choosing a less abrasive method will save you from potential chemical burns and costly plumbing repairs.
Educating all household members on proper drain care practices is also crucial. Teach children and adults alike to avoid flushing anything other than toilet paper down the toilet. Feminine hygiene products, diapers, wipes, and other non-flushable items can easily clog the toilet and sewer lines. Similarly, avoid pouring grease, oil, or food scraps down the kitchen sink drain. These substances can solidify in the pipes, leading to blockages and backups. Instead, dispose of grease and oil in a sealed container and scrape food scraps into the trash or compost bin. Simple awareness and responsible behavior can go a long way in preventing clogged drains and costly plumbing repairs.
Finally, schedule a professional plumbing inspection every few years. A qualified plumber can identify potential problems that you may not be able to see, such as hidden leaks, corroded pipes, or faulty fixtures. Regular inspections can help you catch minor issues before they escalate into major problems, saving you time, money, and stress in the long run. Think of it as a routine checkup for your plumbing system, ensuring that everything is functioning properly and preventing costly surprises down the road. During an inspection, the plumber can also advise you on best practices for maintaining your plumbing system and addressing any specific concerns you may have. This professional insight can be invaluable in maintaining a healthy and efficient plumbing system for years to come.
When to Call a Professional Plumber
While empowering yourself with basic plumbing knowledge is fantastic for home maintenance and smaller repairs, it’s crucial to recognize the limitations of DIY and understand when to call in a professional plumber. Attempting complex or hazardous plumbing work can lead to property damage, injuries, or even violate local building codes. This section outlines scenarios where enlisting the expertise of a licensed plumber is not just advisable, but essential for your safety and the long-term health of your home's plumbing system.
Firstly, if you feel uncomfortable or uncertain about tackling a plumbing repair, it's always best to err on the side of caution and call a professional. Plumbing can be more intricate than it appears, and a simple mistake can quickly escalate into a costly and stressful situation. For example, what seems like a straightforward faucet replacement could involve corroded pipes, specialized tools, or hidden complications within the wall. If you’re hesitating or second-guessing yourself, trust your instincts and contact a qualified plumber. They possess the experience and knowledge to diagnose the problem accurately and implement the appropriate solution safely and efficiently.
Major plumbing issues, such as burst pipes or sewer backups, demand immediate professional attention. A burst pipe, especially during freezing temperatures, can release significant amounts of water in a short period, causing extensive damage to walls, floors, and belongings. Similarly, a sewer backup poses serious health risks due to the presence of bacteria and contaminants. These are not situations for DIY experimentation. Plumbers have specialized equipment to stop the flow of water, repair or replace damaged pipes, and thoroughly clean and sanitize affected areas, mitigating further damage and protecting your health. Attempting to handle these emergencies yourself could lead to increased water damage, potential health hazards, and even structural problems.
Another critical scenario requiring professional intervention is when you suspect a leak behind walls or under floors. Hidden leaks can cause significant damage over time, rotting wood, fostering mold growth, and weakening the structural integrity of your home. Identifying the source of these leaks can be challenging, often requiring specialized equipment like infrared cameras or moisture meters. A plumber can accurately locate the leak, assess the extent of the damage, and implement the necessary repairs to prevent further deterioration. Ignoring a hidden leak can lead to extensive and expensive repairs down the line, far exceeding the cost of hiring a plumber initially.
Dealing with gas lines or gas appliances is another area where DIY is strictly discouraged and potentially life-threatening. Gas leaks are extremely dangerous, posing a fire and explosion risk, as well as the risk of carbon monoxide poisoning. Only licensed plumbers or gas fitters are qualified to work on gas lines and appliances. They possess the specialized tools and training to ensure gas connections are safe and leak-free. Never attempt to repair or modify gas lines or appliances yourself. If you suspect a gas leak, immediately evacuate the premises, contact your gas company, and then call a qualified plumber to assess and repair the situation [9].
Furthermore, if your DIY plumbing efforts prove unsuccessful after multiple attempts, it's time to concede and call a professional. Stubborn clogs, persistent leaks, or recurring problems often indicate a more complex underlying issue that requires specialized knowledge and equipment to resolve. Continuing to tinker with the plumbing without success can potentially exacerbate the problem, leading to more extensive and costly repairs in the long run. Save yourself time, money, and frustration by seeking professional assistance when your DIY attempts fall short.
Complex plumbing installations, such as installing new fixtures, relocating pipes, or hooking up new appliances, should also be entrusted to a qualified plumber. These installations often require specialized knowledge of plumbing codes, proper pipe sizing, and safe connection techniques. Improperly installed plumbing can lead to leaks, water damage, and even violate local building codes, resulting in fines or mandatory corrections. A professional plumber can ensure that the installation is done correctly the first time, saving you potential headaches and expenses in the future.
Finally, be aware that many plumbing projects require permits from your local building department. These permits ensure that the work meets safety standards and complies with local codes. A licensed plumber is familiar with the permit process and can obtain the necessary permits on your behalf. Attempting to perform plumbing work without the required permits can result in fines, delays, and even the need to redo the work to meet code requirements. By hiring a professional plumber, you can ensure that your plumbing project is done legally and safely, giving you peace of mind.
Understanding Plumbing Codes and Regulations
Before you even think about picking up a wrench or cutting into a pipe, a crucial, often overlooked, aspect of home plumbing is understanding and adhering to local plumbing codes and regulations. While a DIY spirit is admirable, ignoring these codes can lead to serious repercussions, ranging from costly fines to dangerous, unsafe living conditions. These codes aren't arbitrary; they are in place to ensure the safety of your home, the health of your family, and the proper functioning of your plumbing system for years to come. They address everything from the materials you can use for piping to the minimum distances required between fixtures and the type of venting necessary for proper drainage. Think of them as the rules of the road for plumbing – without them, chaos reigns [10].
The primary reason for these codes is to ensure safety. For example, regulations dictate the types of pipes allowed for potable (drinking) water to prevent contamination from lead or other harmful substances. They also specify how pipes must be supported to prevent leaks and breakage, which could lead to water damage, mold growth, and structural issues within your home. Electrical grounding requirements related to plumbing are also covered, mitigating the risk of electrical shock in areas where water is present. Beyond safety, codes also focus on the efficient and sustainable use of water resources. Low-flow fixtures, for example, are often mandated to conserve water and reduce strain on municipal water systems. By adhering to these codes, you're not just protecting your home, but also contributing to the responsible use of a vital resource.
Furthermore, it's important to recognize that many plumbing projects, particularly those involving alterations to existing systems or the installation of new fixtures, may require a permit from your local building department. A permit is essentially permission to perform the work, and it typically involves submitting plans and specifications for review. The permit process ensures that the proposed work meets the minimum safety and code requirements. Obtaining a permit is not simply a bureaucratic hurdle; it's a safeguard. Once the work is completed, an inspection is usually required to verify that it was performed in accordance with the approved plans and applicable codes. This inspection is carried out by a qualified plumbing inspector who will check for things like proper pipe connections, adequate venting, and compliance with backflow prevention requirements. Failing to obtain necessary permits can result in hefty fines, stop-work orders, and even the requirement to tear out and redo non-compliant work. Imagine investing time and money into a new bathroom only to be forced to dismantle it because you didn't secure the proper permits – a costly and frustrating scenario that is easily avoided.
Ignoring plumbing codes isn't just a matter of potential fines; it can also create long-term problems that significantly devalue your home. Improperly installed plumbing can lead to leaks, which can cause structural damage, mold growth, and health problems. It can also affect the efficiency of your plumbing system, leading to higher water bills and decreased water pressure. Furthermore, if you ever decide to sell your home, a home inspector will likely identify any code violations, which you will then be required to correct before the sale can proceed. This can be a major headache and a significant expense.
To ensure you're on the right track, it's always wise to consult with a licensed professional plumber, especially before undertaking any major plumbing project. A plumber has the expertise and knowledge to navigate the complexities of plumbing codes and regulations and can ensure that your work meets all applicable requirements. They can also advise you on the best materials and methods to use for your specific project. Even if you plan to do the work yourself, a consultation with a plumber can save you time, money, and potential headaches down the road.
Moreover, plumbing codes are not static; they are constantly evolving to reflect new technologies, materials, and best practices. Staying up-to-date on these changes is a crucial aspect of responsible home maintenance. Subscribe to industry newsletters, attend workshops, or regularly check your local building department's website to stay informed. Being proactive about understanding and adhering to plumbing codes will not only protect your home and family but also give you the confidence to tackle common plumbing fixes with expertise and peace of mind.
Conclusion
Understanding your home's plumbing system, having the right tools, and knowing how to tackle common issues like leaky faucets and clogged drains are essential skills for any homeowner. While DIY repairs can save money and provide a sense of accomplishment, it's crucial to recognize when a professional plumber is needed. Adhering to plumbing codes and regulations ensures the safety and longevity of your plumbing system. By following the guidelines outlined in this article, you can confidently maintain your home's plumbing, prevent costly emergencies, and ensure a comfortable and safe living environment. Empower yourself with knowledge, take proactive measures, and don't hesitate to seek professional help when necessary. Your home and your wallet will thank you for it.
References
- Environmental Protection Agency (EPA), WaterSense.
- American Red Cross, Frozen Pipes.
- The Family Handyman, Plumbing Materials: How to Choose the Right Pipes & Fittings.
- United States Geological Survey (USGS), Pressure and Water.
- This Old House, How to Choose the Right Pipe Wrench.
- Bob Vila, How to Use Teflon Tape.
- Home Tips, Repairing Faucets.
- Alliance for Water Efficiency, Water Leak Calculator.
- Electrical Safety Foundation International (ESFI), Electrical Safety Around Natural Gas.

Hi! Elena Novak here. My background in Interior Architecture and my experiences over 13 years have made me deeply engaged with home and lifestyle writer who helps readers design comfortable, functional, and beautiful spaces on realistic budgets.. I write to share perspectives, spark ideas, and make complex topics feel human.