Editor's brief
This comprehensive guide empowers homeowners to confidently undertake a DIY bathroom remodel. Learn strategic planning, essential demolition, plumbing, tiling, budgeting, and finishing touches to create a beautiful, functional, and valuable space while avoiding common mistakes.
#Bathroom Remodel
#DIY Home
#Home Renovation
#Interior Design
Embarking on a DIY bathroom remodel is an exciting journey, offering the chance to transform a critical space in your home into something truly reflective of your needs and style. Yet, the foundation of any successful home renovation lies not in the first swing of a hammer, but in meticulous, thoughtful planning and careful execution. As an interior architect with over a decade of experience helping homeowners craft comfortable, functional, and beautiful spaces, I can attest that strategic planning and a disciplined approach are the bedrock upon which a stress-free and ultimately rewarding bathroom update is built. This guide aims to empower every homeowner, providing a professional step-by-step walkthrough to transform your bathroom with confidence. Planning Your DIY Bathroom Remodel: A Strategic Approach The initial phase of any renovation, often overlooked in the eagerness to get started, is where you define your vision, prevent costly mistakes, and ensure every detail contributes to your dream bathroom. Define Your Vision and Desired Style: First and foremost, you must define your vision and desired style for the new bathroom, considering both aesthetics and functionality. This involves a deep dive into how you and your family will genuinely use the space. Is this a high-traffic family bathroom needing robust, easy-to-clean surfaces and ample storage, or a tranquil master ensuite, a personal sanctuary for relaxation? Understanding these needs from the outset is crucial fo...
Embarking on a DIY bathroom remodel is an exciting journey, offering the chance to transform a critical space in your home into something truly reflective of your needs and style. Yet, the foundation of any successful home renovation lies not in the first swing of a hammer, but in meticulous, thoughtful planning and careful execution. As an interior architect with over a decade of experience helping homeowners craft comfortable, functional, and beautiful spaces, I can attest that strategic planning and a disciplined approach are the bedrock upon which a stress-free and ultimately rewarding bathroom update is built. This guide aims to empower every homeowner, providing a professional step-by-step walkthrough to transform your bathroom with confidence.
Planning Your DIY Bathroom Remodel: A Strategic Approach
The initial phase of any renovation, often overlooked in the eagerness to get started, is where you define your vision, prevent costly mistakes, and ensure every detail contributes to your dream bathroom.
- Define Your Vision and Desired Style: First and foremost, you must define your vision and desired style for the new bathroom, considering both aesthetics and functionality. This involves a deep dive into how you and your family will genuinely use the space. Is this a high-traffic family bathroom needing robust, easy-to-clean surfaces and ample storage, or a tranquil master ensuite, a personal sanctuary for relaxation? Understanding these needs from the outset is crucial for a DIY bathroom that truly serves its purpose and delights its users.
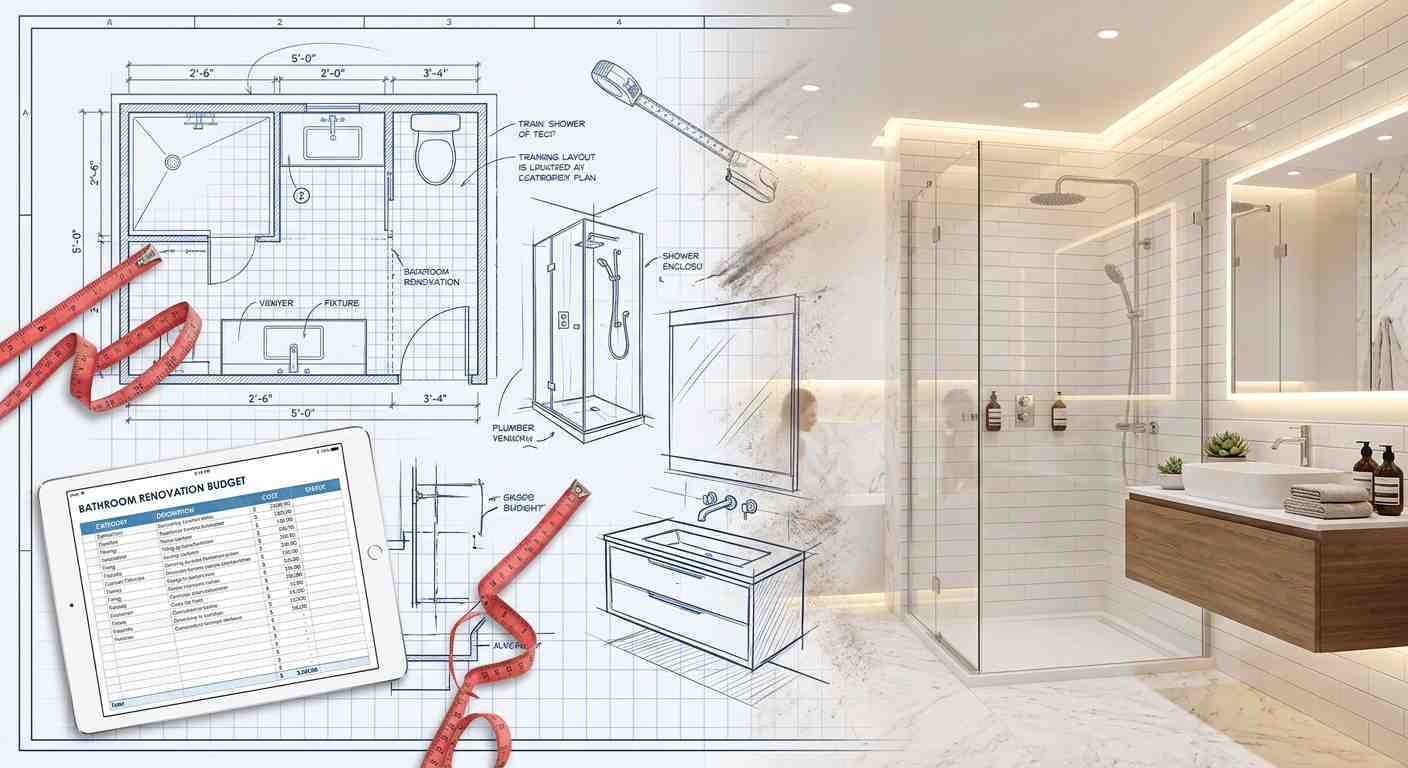
- Establish a Realistic Budget: Once your vision begins to take shape, the next vital step is to establish a realistic budget for your entire bathroom remodel project, accounting for materials, tools, and potential unforeseen expenses. Many aspiring renovators underestimate this critical component, but a well-defined budget is your project's financial compass. Break down costs into key categories like fixtures, vanity, countertops, flooring, and tiles, and always allocate a contingency fund, ideally 10-20% of your total budget, for unexpected issues. Investing in quality materials now often prevents more significant expenses later.
- Research and Gather Inspiration: With your vision and budget in mind, it's time to research and gather inspiration for bathroom design elements, such as tile patterns, fixture styles, and color schemes, to inform your choices. Platforms like Pinterest and Houzz, or local showrooms, are excellent resources. Create a mood board to identify themes, textures, and color palettes that resonate with your aesthetic, ensuring all components work harmoniously in your future bathroom design.
- Create a Detailed Timeline: A comprehensive detailed timeline for each phase of the home renovation, from demolition to the final bathroom update, is essential to maintain organization. This roadmap lists every major task, such as demolition, plumbing, electrical, drywall, flooring, tiling, painting, and fixture installation, sequenced logically to prevent bottlenecks and ensure smooth progress.
- Obtain Necessary Permits: Before any significant structural or plumbing changes for your DIY bathroom begin, you must obtain necessary permits from local authorities. This critical step ensures your renovation complies with local building codes and safety standards, preventing potential fines or complications when selling your home.
- Measure Accurately: Accuracy is paramount when undertaking a home renovation, which is why you must measure your existing bathroom accurately to ensure new fixtures, vanities, and other elements will fit comfortably within the space. Precisely measure locations of windows, doors, and existing plumbing rough-ins, paying close attention to clearances to avoid frustrating and expensive mistakes.
- Consider Long-Term Value: Finally, as you make your selections, always consider the long-term value and impact of your chosen bathroom design on your home's overall appeal and potential resale. Timeless designs, neutral color palettes for major elements, and durable, high-quality materials tend to have broader appeal and offer a better return on investment. A thoughtfully designed bathroom update not only enhances daily living but can significantly boost your home's market value.
By meticulously navigating these planning stages, you lay a solid foundation for a successful and satisfying DIY bathroom remodel, ensuring your renovated space is both a joy to use and a valuable asset to your home.
Essential Demolition and Preparation Steps
Embarking on a DIY bathroom remodel is an exciting journey, promising a refreshing transformation of one of your home’s most essential spaces. The secret to a successful and stress-free home renovation lies in meticulous groundwork. Mastering the essential demolition and preparation steps is paramount to setting a robust foundation, ensuring your new bathroom design stands the test of time and truly embodies the comfort and beauty you envision.
- Safely Shut Off Water Supply: Our first, and perhaps most critical, step in any DIY bathroom project is safeguarding against water damage. Before any demolition begins, you must safely shut off the main water supply to the bathroom and drain all lines to prevent leaks during demolition. Locate your home’s main water shut-off valve, then open all bathroom faucets and flush the toilet until empty. This vital action protects your home from potential floods and structural damage.
- Disconnect Electrical Power: Equally important for your safety is managing electricity. You must disconnect electrical power to the bathroom circuit at the main breaker panel to avoid accidents. Always double-check with a non-contact voltage tester on outlets and light switches before touching any wiring, eliminating the risk of electrocution.
- Carefully Remove Existing Fixtures: With water and electricity safely managed, you’ll now need to carefully remove existing fixtures such as the toilet, vanity, sink, and shower/tub unit, ensuring proper disposal. Each fixture requires specific attention; toilets involve disconnecting the supply line and loosening base bolts, while vanities often mean disconnecting plumbing and unscrewing from the wall. Work methodically to avoid damage to surrounding areas, and consider municipal bulk waste pickup or local recycling centers for disposal.
- Tear Out Old Surfaces: Next on your agenda is the demolition of surfaces. It’s time to tear out old flooring, wall tiles, and any other materials slated for replacement. Always wear protective gear: gloves, eye protection, a dust mask, and sturdy shoes. Use appropriate tools like a hammer and chisel for tiles, or a pry bar for vinyl, being mindful of the subfloor underneath. The goal is to strip the room back to its bare bones, creating a clean canvas for your new bathroom design.
- Inspect for Damage: Once the demolition dust begins to settle, it’s crucial to inspect the subfloor and wall studs for any signs of water damage, mold, or structural issues, addressing them before proceeding. Look for discolored wood, softness, or a musty odor. Ignoring these issues now will compromise the longevity and safety of your new DIY bathroom. Significant damage may require professional consultation.
- Thoroughly Clean the Space: After stripping the space bare and addressing any underlying issues, clean the entire space thoroughly, removing dust and debris, to create a clean canvas for your DIY bathroom transformation. Dust and debris can prevent new adhesives from bonding correctly and compromise paint finishes. Use a shop-vac with a HEPA filter, sweep, and wipe down all surfaces.
- Protect Adjacent Areas: Finally, to keep your home tidy and reduce post-remodel cleaning, remember to protect adjacent areas of your home from dust and damage using plastic sheeting and drop cloths during this phase of the bathroom remodel. This proactive measure saves cleaning hours and protects existing furniture and air quality.
By taking these essential demolition and preparation steps seriously, you're building the foundation for a beautiful, durable, and truly personalized DIY bathroom that you'll cherish for years to come.
Navigating Plumbing and Electrical Updates: The Hidden Foundation of Your Bathroom Remodel
When embarking on a DIY bathroom remodel, many homeowners are naturally drawn to the aesthetics. However, the true success and longevity of your home renovation hinge on meticulously planning and executing the less visible, yet utterly critical, plumbing and electrical updates. These systems are the hidden backbone of your bathroom, ensuring everything operates flawlessly and safely.
- Assess Existing Plumbing Layout: The first crucial step in any bathroom design overhaul is to thoroughly assess your existing plumbing layout and determine if any pipes need to be moved or replaced to accommodate your new bathroom design. Understand current hot and cold supply lines, drain runs, and vent stacks. Consider the age and material of your pipes; older, corroded pipes might warrant full replacement. Making these critical decisions on paper before demolition is more cost-effective.
- Install New Supply and Drain Pipes: Once your new layout is finalized, you’ll likely need to install new supply lines and drain pipes for the vanity, toilet, and shower/tub if your layout is changing as part of the home renovation. Choose materials like flexible PEX tubing or traditional copper for supply lines, and PVC for drains. Ensure drain lines have the correct slope (typically 1/4 inch per foot) to prevent clogs and ensure efficient wastewater removal.
- Perform a Pressure Test: Before you even think about concealing your hard work behind drywall, it's absolutely non-negotiable to ensure all plumbing connections are secure and leak-free by performing a pressure test before closing up walls. This involves plugging drains and pressurizing supply lines to detect hidden leaks, preventing costly water damage, mold, and the need to tear out finished walls later.
- Review Electrical Needs: Moving beyond water, you’ll need to thoroughly review your electrical needs for new lighting, outlets, and exhaust fans, and plan for any necessary wiring adjustments. Consider layered lighting, the number of outlets for modern appliances, and a crucial exhaust fan for moisture control and air quality. Upgrading to a more powerful fan or adding new fixtures may require adjusting existing wiring or pulling new circuits.
- Install Electrical Boxes and Run Wiring: Once your electrical plan is solid, you'll need to install new electrical boxes and run wiring according to local building codes, consulting an electrician if unsure. Electrical work is profoundly about safety; every new fixture requires an appropriately sized box, and wiring involves careful consideration of wire gauge and secure connections. When in doubt about complex wiring or code requirements, always bring in a licensed electrician.
- Confirm Grounding and Breaker Sizing: Following the wiring, it’s imperative to confirm that all electrical work is grounded and circuit breakers are correctly sized for the load of your new bathroom update components. Grounding prevents dangerous shocks, and properly sized breakers prevent trips and potential fire hazards from overloaded circuits. An electrician can calculate the total load and ensure your system is safe.
- Consider Dedicated Circuits: Finally, for those looking to elevate their DIY bathroom project with a touch of luxury, consider adding dedicated circuits for high-power appliances like a heated towel rail or a jetted tub. These amenities enhance comfort but draw substantial power, making a dedicated circuit essential to prevent overloading other circuits and ensure uninterrupted enjoyment.
Flawless Tiling and Flooring Application: The Foundation of Your Dream Bathroom
Few stages are as transformative and critical as the flawless application of tiling and flooring in a DIY bathroom remodel. The floor and wall surfaces form the very foundation of your bathroom's functionality, durability, and overall aesthetic.
- Prepare Subfloor and Walls: The journey to impeccable tiling begins long before the first tile is laid. You must meticulously prepare the subfloor and walls by ensuring they are clean, level, and free of any debris, using a self-leveling compound if necessary. A pristine, level surface ensures optimal adhesion for your tiles and prevents future issues like cracked tiles. For floors, this might involve patching or self-leveling, and for walls, ensuring they are free of dust, grease, and loose paint.
- Apply Waterproof Membrane or Cement Board: Next, and crucially, apply a waterproof membrane or cement board in shower areas and other moisture-prone zones to protect against water damage. This step is vital for the longevity of your DIY bathroom, as proper waterproofing prevents moisture from seeping into walls and floors, which can lead to mold, rot, and costly damage.
- Plan Your Tile Layout: With your surfaces prepped and protected, it’s time to plan your tile layout meticulously, starting from a central point, to minimize cuts and ensure a symmetrical bathroom design. Dry-lay your tiles or map out your plan with chalk lines to visualize patterns, minimize awkward cuts at edges (aiming for cuts no smaller than half a tile), and ensure overall flow.
- Use Appropriate Thin-Set Mortar: The adhesive you choose is equally important: use the appropriate thin-set mortar for your chosen tile type and apply it evenly, using a notched trowel for proper adhesion. Different tiles require specific thin-set formulations; for instance, porcelain and natural stone often benefit from modified thin-sets for enhanced bond strength. Proper mixing to a peanut butter-like consistency is key, and the notched trowel ensures 100% coverage and a strong, lasting bond.
- Install Tiles Carefully: Install tiles carefully, maintaining consistent grout lines with spacers, and check for levelness frequently. Place each tile with a slight twisting motion to embed it fully into the thin-set. Spacers guarantee uniform grout lines, contributing significantly to a professional look. Regularly use a level and straightedge to check flatness and alignment, making immediate adjustments.
- Allow Thin-Set to Cure: Resist the urge to rush the next stage. It's imperative to allow the thin-set to cure completely before applying grout, following the manufacturer's recommendations. Curing is a chemical process where the thin-set reaches maximum strength, typically taking at least 24 to 48 hours depending on conditions. Rushing can compromise the bond and lead to loose tiles or cracked grout.
- Apply Grout Thoroughly: Once cured, the grout defines your surfaces. Select a grout color that complements your bathroom remodel aesthetic and apply it thoroughly, ensuring all joints are filled. Using a rubber float, apply grout diagonally across the tile surface, pressing firmly into every joint. Work in manageable sections to prevent premature drying.
- Clean Excess Grout and Seal: Finally, clean excess grout from the tile surface promptly with a damp sponge to avoid haze, and then seal the grout after it dries. Rinse the sponge frequently to prevent grout haze. Once the grout has fully dried and cured (usually 48-72 hours), apply a high-quality grout sealer, especially in wet areas, to create a barrier against moisture and stains.
Budgeting and Sourcing Materials Smartly: The Financial Framework of Your Remodel
The foundation of any successful home renovation lies not just in aesthetic vision, but in meticulous planning, particularly when it comes to budgeting and sourcing materials. This initial phase is absolutely critical for keeping your DIY bathroom project on track, on budget, and free from unnecessary stress.
- Create a Detailed Expenditure Spreadsheet: To begin, creating a detailed spreadsheet to track all expenditures is not merely a suggestion; it's an indispensable tool in your remodeling guide. This spreadsheet should categorize every single potential cost, from fixtures and tiles to plumbing and electrical components, and even tools. This offers a clear, granular view of where every expense is going, allowing you to monitor spending effectively against your overall bathroom remodel budget.
- Prioritize Strategic Investments: Once your detailed budget is taking shape, it's time to prioritize where you want to invest more significantly. Strategically allocating your funds means deciding which items will offer the most impact, both visually and functionally, for your unique lifestyle. Perhaps a high-quality vanity or durable, slip-resistant flooring is a non-negotiable. Thoughtful investment upfront often translates into long-term satisfaction and fewer maintenance headaches.
- Explore Various Suppliers: Next, dedicate ample time to exploring various suppliers for your materials. Look at local hardware stores for immediate availability and personalized advice, as well as online retailers for a broader selection and competitive pricing. Specialty bathroom shops can be invaluable for unique or high-end items. Comparing prices and quality across these different avenues will ensure you’re making informed decisions and getting the best value.
- Look for Sales and Discounts: While comparing suppliers, keep an eye out for sales, clearance items, or discounted bundles. These opportunities can significantly reduce your material costs without forcing you to compromise on your bathroom design vision. Just ensure that any discounted items still meet your quality standards and fit seamlessly into your overall aesthetic.
- Order Materials in Advance: A crucial, yet often overlooked, aspect of sourcing is ordering materials in advance. Custom items, unique tiles, or specific plumbing fixtures can have surprisingly long lead times, sometimes extending to several weeks or even months. Ordering these items early ensures they arrive on schedule, preventing your entire remodeling guide timeline from grinding to a halt.
- Factor in Shipping Costs and Delivery Times: Furthermore, always factor in potential shipping costs and delivery times when sourcing materials for your DIY bathroom project. A seemingly cheap online purchase can quickly become expensive once oversized shipping fees are added. Confirm delivery schedules, especially for large or heavy items like bathtubs or bulk tile orders, to ensure someone is available to receive them and to coordinate with your project timeline.
- Purchase Extra Materials: Finally, always purchase a bit extra of certain materials, especially tiles. A common rule of thumb is to buy at least 10-15% more tiles than your estimated square footage. This accounts for inevitable cuts, accidental breakages during installation, or even slight color variations between different production batches if you need to reorder later. Having spares from the original batch can save immense hassle and the potential headache of trying to find a perfect match years down the line.
Fixture Installation and Finishing Touches for Your Bathroom Update
After the demolition dust has settled and your new plumbing and electrical rough-ins are in place, you’ve reached one of the most exciting phases of your DIY bathroom remodel: the installation of your new fixtures and the crucial finishing touches. This stage truly brings your vision to life, transforming a functional space into a sanctuary tailored to your tastes.
- Install Vanity and Countertop: The journey often begins with the installation of your new vanity and countertop. When installing, the paramount concern is ensuring it is perfectly level and securely anchored to the wall. Uneven surfaces are not only aesthetically displeasing but can also lead to issues with drainage or doors not closing properly. Use a reliable level and appropriate fasteners for your wall type to prevent any future wobbling.
- Mount Sink and Connect Faucet: Following the vanity, you’ll mount the sink and connect the faucet, a critical step that demands attention to detail. Apply plumber’s putty or a silicone sealant around the drain flange to create a watertight seal, then secure the sink to the countertop. When connecting the faucet, ensure all supply lines are tightly fastened. Crucially, run water through the faucet to verify all plumbing connections are tight and leak-free before sealing everything up.
- Install New Toilet: Next on your list is installing the new toilet. The key here is the wax ring, which creates a watertight seal between the toilet and the waste pipe. Carefully set the toilet bowl onto the wax ring, pressing down firmly with an even, twisting motion to ensure a complete seal. Then, firmly bolt it to the floor using the provided hardware, ensuring it's stable and doesn't rock.
- Fit New Shower or Bathtub Unit: Fitting the new shower or bathtub unit is another cornerstone of your bathroom update. Whether you're installing a pre-fabricated shower enclosure or a standalone bathtub, proper drainage and waterproofing are non-negotiable. Ensure the unit is level and securely positioned, connecting all drain assemblies according to plumbing codes. The most critical aspect is sealing all edges with waterproof caulk specifically designed for bathrooms to prevent moisture seepage.
- Install Lighting Fixtures, Mirrors, and Medicine Cabinets: Once the larger fixtures are in place, it’s time to illuminate your hard work. Installing lighting fixtures, mirrors, and medicine cabinets brings both functionality and style to your space. For lighting, always confirm that all electrical connections are safe and functional, following local electrical codes. Mirrors and medicine cabinets should be mounted securely, locating wall studs for robust support.
- Add Accessories: With the major installations complete, you can now add the smaller but impactful accessories. Items such as towel bars, toilet paper holders, and robe hooks are the jewelry of your DIY bathroom. Strategically place them for convenience and aesthetics, considering the flow of movement in the room.
- Apply Fresh Coat of Paint: Finally, to truly unify and refresh the space, apply a fresh coat of paint to walls and trim. This is where you can truly infuse personality and enhance the overall ambiance of your DIY bathroom. Choose colors that complement your chosen fixtures and create the mood you desire, pulling all your carefully chosen elements together into a cohesive bathroom design.
- Conduct Final Inspection: The ultimate step in your remodeling guide is conducting a final inspection of all installed elements. Walk through your new bathroom with a critical eye. Check that everything is secure, functional, and aesthetically pleasing. Turn on the faucet, flush the toilet, test the lights, and open and close cabinet doors. Look for any drips, wobbles, or imperfections.
Post-Remodel Care and Maintenance for a Lasting Bathroom Update
Completing a DIY bathroom remodel is a significant achievement, a testament to your vision and hard work. Yet, the journey doesn't quite end with the last tile laid or the final coat of paint. To truly savor the fruits of your labor and ensure your refreshed bathroom design retains its beauty and functionality for years, consistent care and diligent maintenance are absolutely essential.
- Understand Cleaning Instructions: One of the most critical aspects of post-remodel care involves understanding the specific cleaning instructions for your new fixtures, tiles, and surfaces. Abrasive cleaners can damage delicate finishes like natural stone, and even chrome faucets require gentle, non-abrasive cleaners to maintain their shine. Always consult the manufacturer’s guidelines for each product installed during your DIY bathroom project.
- Regularly Maintain Grout Lines: Beyond daily cleaning, regularly maintaining your grout lines is paramount for a hygienic and visually appealing bathroom. Grout is porous and can quickly become a breeding ground for mold and mildew. Clean grout lines with a mild, pH-neutral cleaner and a soft-bristled brush, especially in high-moisture areas. Applying a high-quality grout sealer periodically—typically every one to three years—creates a protective barrier that repels water and stains.
- Periodically Inspect Plumbing Connections: Another often-overlooked but vital aspect is periodically inspecting plumbing connections for any signs of leaks or drips. A tiny drip can lead to significant water damage, including warped cabinetry and damaged subflooring. Make it a routine to check these areas every few months using a flashlight and a dry paper towel to detect any moisture. Promptly addressing minor issues prevents them from escalating into larger, more expensive home renovation problems.
- Ensure Proper Ventilation: Proper ventilation is a non-negotiable element of effective bathroom care. Regularly using your exhaust fan during and for at least 15-20 minutes after every shower or bath is essential to rapidly remove moisture-laden air. This helps prevent peeling paint, warped wood trim, fogged mirrors, mold growth, and structural damage to drywall.
- Address Small Issues Immediately: It's a common mistake: ignoring minor issues until they become major headaches. Addressing any small signs of wear and tear immediately is crucial for preserving your bathroom update. A loose caulk line around the tub or a tiny chip in a tile can quickly escalate. Promptly resealing caulk, repairing small chips, or tightening fixtures prevents these minor flaws from developing into extensive and costly repairs.
- Create a 'Bathroom Bible': Finally, create a 'bathroom bible'—a dedicated folder, physical or digital, for all product warranties and instruction manuals. This seemingly small organizational step offers immense practical value. Should a fixture malfunction or a surface require a specific cleaning solution, having these documents readily accessible means you can quickly find model numbers, understand warranty coverage, or refer to precise troubleshooting steps.
Ultimately, after all your hard work on this bathroom update, the goal is to enjoy the beautifully refreshed space you've created. By integrating these post-remodel care and maintenance tips into your routine, you’re actively preserving the beauty, functionality, and value of your DIY bathroom design for many wonderful years to come.
References
- Clutter Ninjas. (n.d.). Tips for Efficient Bathroom Demolition Cleanup - Clutter Ninjas. Retrieved from View source
- Rooter Hero. (2025, January 2). Why Is Bathroom Ventilation Important? - Rooter Hero. Retrieved from View source
- Mira Showers. (2024, September 18). A quick guide to bathroom ventilation by Mira Showers. Retrieved from View source
- Nelson Maid. (2024, May 14). Simple Tricks for Cleaning Your Bathroom Fixtures - Nelson Maid. Retrieved from View source
- Lowe's. (n.d.). How to Prep a Tile Floor - Lowe's. Retrieved from View source
- Livingetc. (2025, January 28). Cleaning Bathroom Fixtures the Right Way Is the Secret to Keeping Them Beautiful — Here's What to Do - Livingetc. Retrieved from View source
- Hoeft Design Build. (2025, March 12). What is a Realistic Budget for a Bathroom Remodel in 2025? - Hoeft Design Build. Retrieved from View source
- Orta's Flooring & Covering LLC. (2025, May 16). Preparing Subfloors for Bathroom Tile Flooring Installation - Orta's Flooring & Covering LLC. Retrieved from View source
- The Home Depot. (2025, May 2). How to Grout Tile - The Home Depot. Retrieved from View source
- LiLi Tile. (2023, September 18). How Long Does Thin-Set Take to Dry? - LiLi Tile. Retrieved from View source
- RUBI Blog USA. (2025, January 14). How to Lay Tile in a Bathroom: 5 Easy Steps – Rubi Blog USA. Retrieved from View source
- Smartsheet. (2025, January 15). Free Excel Construction Budget Templates: All Project Types - Smartsheet. Retrieved from View source
- Priorities for a Bathroom Remodel. (2021, October 26). Priorities for a Bathroom Remodel. Retrieved from View source
- haus & hand. (2024, February 21). How Long Does Tile Mortar Take to Dry - haus & hand. Retrieved from View source
- Dave's Home Improvement. (2025, July 8). Bathroom Remodel ROI: Worth the Investment Before Selling? - Dave's Home Improvement. Retrieved from View source
- Grace In My Space. (2026, January 9). How to Do An Affordable Bathroom Remodel Under $1,000 in 2026 - Grace In My Space. Retrieved from View source
- HGTV. (n.d.). Budgeting for a Bathroom Remodel | HGTV. Retrieved from View source
- The Healthy Voyager. (2026, February 2). Why So Many Homeowners Are Prioritizing Bathroom Upgrades - The Healthy Voyager. Retrieved from View source
- Floor Advisor. (2024, December 4). The ROI of Bathroom Remodeling: What Upgrades Add the Most Value? - Floor Advisor. Retrieved from View source
- Reddit. (2023, February 5). How to prepare a subfloor for tiling? : r/DIYUK. Retrieved from View source
- Topps Tiles. (n.d.). How To Grout | Topps Tiles. Retrieved from View source
- The DIY Guy. (2024, June 8). How to Tile and Grout a Bathroom Floor - Complete Beginners Guide. Retrieved from View source
- The Palette Muse. (2025, July 17). Control your Remodel Budget with this Simple Worksheet - The Palette Muse. Retrieved from View source
- Fuhgeddaboutit Junk Removal. (2025, October 21). Tips for Efficient Bathroom Demolition Cleanup - Fuhgeddaboutit Junk Removal. Retrieved from View source
- Junk Out. (n.d.). Cleaning Up After a Demolition Project - Junk Out. Retrieved from View source
- Metropolitan Bath & Tile. (2024, December 9). Importance of Bathroom Ventilation: Keep It Cool, Fresh, & Mold-Free - Metropolitan Bath & Tile. Retrieved from View source
- Edward Martin. (2026, February 11). How To Plan Shower Tile Designs Before Starting A Bathroom Remodel - Edward Martin. Retrieved from View source
- The Healthy Voyager. (2026, February 2). Why So Many Homeowners Are Prioritizing Bathroom Upgrades - The Healthy Voyager. Retrieved from View source
- Rachel Rossi. (n.d.). Preparing a Budget for Your Next Remodel: Tips and Tools - Rachel Rossi. Retrieved from View source
- The Home Depot. (2025, May 2). How to Grout Tile - The Home Depot. Retrieved from View source
- Family Handyman. (2024, September 10). How to Grout Tile: Grouting Tips and Techniques - Family Handyman. Retrieved from View source
- LiLi Tile. (2023, September 18). How Long Does Thin-Set Take to Dry? - LiLi Tile. Retrieved from View source
- SGM, Inc. (n.d.). Fast Set Thin-Set Mortar (Polymer Modified) - SGM, Inc. Retrieved from View source
- Tile Council of North America. (n.d.). Concrete Curing | Tile Council of North America. Retrieved from View source
- Lowe's. (2024, December 18). How to Clean Bathroom Faucets & Fixture - Lowe's. Retrieved from View source
- The BEST Way to Budget for a Bathroom Remodel - YouTube. (2026, January 10). Retrieved from View source
- Condo Blues. (2020, January 26). How to Prep a Wood Subfloor for New Tile - Condo Blues. Retrieved from View source
- This Old House. (n.d.). How to install cement board. Retrieved from View source
- Orta's Flooring & Covering LLC. (2025, May 16). Preparing Subfloors for Bathroom Tile Flooring Installation - Orta's Flooring & Covering LLC. Retrieved from View source
- The Importance Of Good Bathroom Ventilation. (2025, March 24). Retrieved from View source
- The Hidden Value of Bathroom Ventilation: Why It's Essential for Your Remodel. (2025, January 9). Retrieved from View source
- Cleaning Up After a Demolition Project - Junk Out. (n.d.). Retrieved from View source
- What measures are taken to clean and remove debris from the site after demolition? (n.d.). Retrieved from View source
- Post-Renovation Bathroom Maintenance: Cleaning and Care Tips. (2025, June 3). Retrieved from View source
- The dos and don'ts of cleaning bathroom fixtures. (2024, April 14). Retrieved from View source
- Excel Home Renovation Budget Template. (n.d.). Retrieved from View source
- How to Prioritise Your Spending During a Bathroom Remodel. (2023, December 10). Retrieved from View source
- FREE Home Renovation Budget Spreadsheet (Google Sheet). (n.d.). Retrieved from View source
- Bathroom Tile Layout Guide | Patterns That Transform Your Space. (2025, December 5). Retrieved from View source
- How Long Does Mortar Take to Cure? Tips & Timeline. (2020, January 13). Retrieved from View source
- How to Arrange Tiles: Ultimate Step-by-Step Guide for 2025. (2025, April 29). Retrieved from View source
- HOW TO PREPARE YOUR SUBFLOOR FOR TILING AND AVOID COSTLY MISTAKES. (n.d.). Retrieved from View source

Hi! Elena Novak here. My background in Interior Architecture and my experiences over 13 years have made me deeply engaged with home and lifestyle writer who helps readers design comfortable, functional, and beautiful spaces on realistic budgets.. I write to share perspectives, spark ideas, and make complex topics feel human.